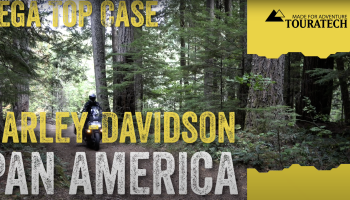
In this video we walk you through the installation of the Touratech Steel Crash Bars for the Harley-Davidson Pan America. Without the proper protection, the Pan America’s radiator, tank, engine and fairings are left vulnerable to damage.
Like a roll-cage for the front end of your Harley, Touratech crash bars give your ride the ultimate level of protection for on and off-road drops. Made of 25mm (1″) stainless steel tubing, our bars are designed to take the impact of a fall, but not get in the way.
The special design of the Touratech H-D Pan America crash bars accents the bike’s unique lines while providing ultimate protection to its vitals. The black powder-coated finish looks great on the bike, and the stainless steel won’t rust or corrode.
FULL TRANSCRIPT:
Hello and welcome to another Touratech product installation video. My name is Iain and we’re going to be installing the Touratech crash bars on this Harley Davidson Pan America. This installation is actually quite easy. The first step is if you have a factory or any skid plate on this motorcycle, you’ll have to remove it to get access to the bottom bolt. But those, I’m not going to cover how to take the skid plate off because it should be self-explanatory. The install itself is quite easy. There are three bolts per side. They all use a six millimeter Allen wrench, so to complete this installation you’ll need a six millimeter Allen wrench, a small mallet to hammer in some pipe plugs, and some thread locking agent to keep all the bolts tight for all the miles you’ve got ahead of you. As always, I recommend going to the Touratech website to print out the instructions, make sure you know exactly what bolts go where.
Now let’s gather up the tools and the parts and get to work. The first thing you want to do on this install is take these little pipe plugs here and plug the open end of the pipe. This is up at the top of both sides of the crash bar. You can probably do this by hand. If not, just get a mallet and bonk it in. But I find it’s pretty easy to get it started and just push it in with the palm of your hand.
All right, before we head over to the motorcycle, I’d like to start by putting the washer down over all six of the bolts, and then putting some thread locking agent on all six of the bolts as well. You’ll notice that you have four M8 x 25 bolts and two M8 x 30 bolts. You want to keep those separate because the longer bolts here go at the top mounting portion. The shorter bolts go in the front in the bottom mounting position. Now we can head over to the bike with the two long or with one of the longer bolts and one crash bar. Okay, here we are at the motorcycle. I’ve got the crash bar for this side and one of the longer 8 x 30 bolts. You start by feeding the crash bar over the front of the radiator protector area and then up into the top to hit this mounting point right here.
Now, I’m going to leave this bolt just started enough so that the threads are set, but enough that there’s a lot of room here to wiggle it. That makes it easier to line up all the other bolts. Now I’m going to do the bottom and the front, loose as well. The bottom and front position, both use M8 x 25 bolts. Make sure you got your thread lock and your washer installed. Now I’ve got all three bolts installed loosely. I can still move the crash bar around like this. Now I’m going to go do the exact same on the opposite side.
All right, and just like that, the crash bars are installed. On my particular bike, on the clutch lever side, there was a zip tie that I needed to remove to make room for the lower mounting position so that I wasn’t pinching any wires. Easy just to redirect those wires to where they need to be. Also, on my bike, I had a hard time lining up the bolt holes with the front sub frame. Maybe something was a little bit tweaked on this bike. I was able to resolve that by loosening a couple of the mounting bolts on the front sub frame. But hopefully you don’t have to worry about that on your bike. It wasn’t anything to do with the Touratech products, it was actually the sub frame itself. When I loosened, the bolts kind of twisted to the side and I had a hard time lining the hole up.
But if you want to learn anything else about Touratech products that we make for the Pan America or for any other adventure bike, please visit our website, touratech-usa.com. If you want to learn more about product installation, don’t forget to subscribe to our YouTube channel. As always, thanks for watching and enjoy the ride.
See all Touratech products for the Harley-Davidson Pan America
