Tubular stainless-steel pannier racks for the Yamaha Tenere 700.
This pannier rack attaches at existing frame points on the bike and does not require any drilling or cutting to install. Touratech’s tough, cross-braced rack system acts like an additional subframe, strengthening the rear of the bike, and in some cases acts like a rear crash bar. This heavy-duty rack is made of 18mm stainless steel tubing and is designed to mount any ZEGA Mundo, Pro, or Evo Panniers. Also makes a great support system for soft luggage systems. In this video we walk you through the steps!
TRANSCRIPTION:
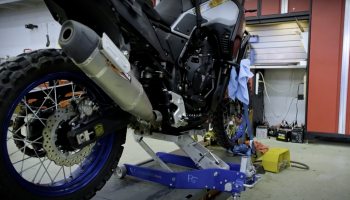
Hey, Ian, here with Touratech USA coming to you from my backyard today. We’ve got the brand new Yamaha T7 and we’re going to be installing the Touratech pannier racks. These are electric polished stainless steel. They’re made out of an 18 millimeter diameter tubing and the installation is exactly the same on both sides of the motorcycle. So let’s get to work.
So the first step for me is always to go onto the Touratech website and download the instructions. We have them hosted in a PDF format, so you can either print them out or view them on your cell phone or a tablet or a computer. I go through the instructions and then go through the hardware pack to verify that I have everything here before I get started. So I’ve got these four spacers and these four different spacers. It comes with two different sets because these racks can be mounted with or without a top case rack or passenger grab handles. You’ve got six plugs here for the open ends of the tubing. Four long M8 bolts, two short, M6 bolts, four M8 washers, two M8 spacers, four M6 washers, two M6 nuts and then these four plastic pieces here are trim and mounting for the crossbar at the back.
All right, over here at the bike, we have some hardware to remove before we get started. We have to take off these two spacers at the top. These use a Torx T 40 fastener, and then we also have to take off the two bolts down here that hold the passenger pegs on. Those are a six millimeter Allen wrench. So we have all the fasteners pulled out of the bike that we’re going to need to remove. So now back to the workbench, use these plastic plugs, three of them for each side, and you’re going to cap all the open ends of the tubing here.
You can just push these in with your thumb. Some of them might need a bonk from a hammer. Okay, on our bike we’re only going to be installing the pannier racks at this time. So we are going to use these spacers that have the hourglass shape with the extra little length on them there. So we need these four bolts and these four washers right here. I’m going to put thread locker on these bolts. We’re going to use them two at a time, head over the motorcycle and get them installed.
So here we are at the bike, take two of the long M8 bolts with one of the M8 washers behind the head of each one, drop them into the pannier rack and then take your hourglass spacers. See how they have the extra long bit here? That faces toward the motorcycle. Slide those over both bolts, and then just bring them up to the bike here and start the bolts just by hand. For the passenger pigs, you just reuse the original bolts that came in the passenger pegs. You’ll see here, the pannier rack fits under the rear most bolt and they give a spacer that’s the exact same thickness here to use at the front bolt. You can reassemble these just the way they came. Yamaha didn’t put any thread locker on these from the factory. I’m going to throw some on just to make sure these don’t vibrate out. I’m leaving these bolts loose. I’ve got the bolts up top loose as well. Great. Now we’re going to go throw the rack on the other side of the motorcycle exactly the same way.
Okay. Both racks are installed. All the bolts are loose so we can move everything around. Now it’s time to address the crossbar at the back. So the crossbar at the back is a fairly unique arrangement hardware wise. You’re going to use these. I don’t even know what to call them… Inserts? They go in the end of the tube like that and they fit perfectly with that flush cut. Then you take these plastic washer, spacer guys sit like that on the outside. Then the bolt goes through there. You do a washer on both sides with the nut on the back. These bolts are going to be going into nylock nuts. So be sure to throw anti-seize on these before you install them. They’re stainless steel so that the threads will gall up if you don’t do it right.
So I hope you can see this on video, but on the crossbar here, one side is longer than the other side. That’s because the pannier racks on this bike are offset to clear the exhaust pipe. So this thing needs to be installed this way with the longer side on the exhaust pipe side. So you take the bolt, put a washer on it and then put that plastic spacer on, put that whole assembly through the pipe that also has the plastic
insert in it. Then put that over the end of the pannier rack. One more washer and thread the nut on there. Same thing on the other side.
All right, we now have all the bolts in place and it’s time to start tightening them down. I like to start with the crossbar here, because it’s the smallest bolt and then I’ll work my way forward from there. So these bolts for the crossbar, they use a four millimeter Allen wrench here on the back and then a 10 millimeter ratchet or a 10 millimeter combo wrench on the backside. Now that we’ve changed out the hardware at the top here from the Yamaha stuff to the Touratech stuff, both these upper bolts and the passenger peg bolts are going to use a six millimeter Allen wrench. So let’s tighten them up starting at the top. Okay. Pannier rack installation is complete. This thing’s ready for your cases to be mounted on, go for a ride, bring your luggage with you no matter where you ride.