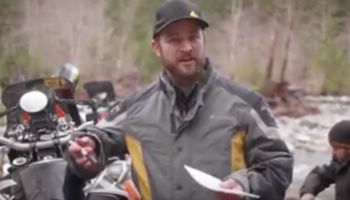
Riding Tips for New ADV Motorcyclists
For well over a decade now, Adventure motorcycling has continued as the fastest growing segment in the industry. And for good reason. The bigger ADV bikes provide comfort for extended touring, allowing riders to tackle 600-mile days on the asphalt with ease. This is due to their upright ergonomics and typical protection, which is vastly enhanced due to aftermarket parts such as windscreens and handguards.
But when the road turns to dirt, the true beauty of the ADV lifestyle is exposed. Depending on what tire you’re running, these bikes can take you just about anywhere your your bike will fit, from a boxer-wide BMW R 1200 GS to a slim KTM 1090 Adventure R.
Plenty of training is available at places like Touratech rallies and the Jimmy Lewis schools, but sometimes life’s a bit busy to travel for the training. The next best thing is online information, but sometimes the information is either worthless or far too advanced for the newbies. Don’t worry; we’re here to help. These tips are simple, and will help you get out there and truly enjoy what adventure motorcycling riding is all about.
We’ll follow up with more advanced tips, but for now let’s cover the basics. But first, remember the biggest tip ever – respect your motorcycle. These ADV bikes have loads of power, and you’ll be much closer to stationary objects like trees and rocks. Respect the bike and it’ll respect you.

1. ADV Bike Setup
First thing to accomplish is optimal setup of you bike’s controls, meaning handlebar position, and lever positions (out and in; angle to the ground). Since you’ll be standing for loads of riding, make sure the controls have a happy medium of comfort between sitting and standing. You’ll likely want your clutch and brake levers pointed downward a bit so you don’t have an awkward twist on your wrists while standing up.
2. Tires Decisions…Off-Road or On?
Tire decisions are everything in the world of adventure motorcycling; your decision directly correlates to just how far you’ll go off road. Most big-bike ADV riders rely on a 40-percent on-road/60-percent off-road such as the Continental TKC-80 tires. The problem is the more road you ride with these types of tires, the less mileage you’ll get out of them. Contingent on your riding style and how much on-road usage, we saw as little as 1500 miles from a rear tire to as much as 8000. Do 100 mph on the highway for extended periods of time, and these types of tires quickly disintegrate.
Also, when off-road, especially any type more challenging than a gravel fire road, you’ll want to drop your tire’s pressure. Check with your tire manufacturer for recommendations, but a good rule of thumb is 25 PSI off-road, and around 40 PSI on road.

3. Gear Choices
Comfort is everything, so make sure you purchase not only gear that fits correctly, but is also waterproof. If not, make sure to bring a rainsuit! Start with a great set of base layers, which we offer for both warm and cold riding. Next, have waterproof pants, jacket and gloves. In regards to your helmet, if it doesn’t have a Pinlock, do anything you can to prevent fogging. And make sure your boots are grippy..especially if you don’t have aftermarket ADV-specific foot pegs.
4. Standing is Vital
As we said in the first tip about properly setting up your motorcycle for comfort, standing is vital. You’ll be doing a lot of it, so practice getting comfortable standing on the bike, always on the balls of your feet, which is where you have the most balance. Don’t think you have the right body position/footing? Take your hands off the handlebars while stationary (preferably on a center stand); if you lose balance, you’re not in the right position.

5. Balance is Vital
We mentioned balance above, but we elaborate. Each bike will feel different in regards to balance, but the best way to learn your balance is to sit on the stationary motorcycle not secured by a kickstand or centerstand. Hold the handlebars normally, and try to balance your bike with both feet on the footpegs. This will also get your feet trained for quick action when losing balance on the trail or slipping off a peg. You’ll be amazed at how much easier this gets with practice.
Also, to further work on balance, ride your motorcycle at the slowest pace possible, and progressively create a more challenging situation by letting go of the handlebars (one at a time, then both!), taking a foot of the peg and bringing it around to the other side, etc. Try to ride at the slowest speeds possible. This will get you up to balance quickly.
6. Turning in Dirt – Don’t lean into it; Counterbalance
This is sometimes the toughest thing for a new ADV rider to learn. On the street, we lean into corners, which you will continue to do while riding on roads. But in the dirt, things are much different. Your body remains straight up and down, and you lean the bike underneath you to the left or right. To stop the bike from falling over, you counterbalance it.
The secret to counterbalancing is always keeping the outer peg weighted; if you’re leaning a bike to the right, you should have all weight for on the left footpeg; leaning to the left, all weight on the right footpeg. Practice figure eights while counterbalancing, making right and left turns with zero weight on the inside peg (take your foot completely off if needed when practicing, but only when practicing…you need that rear brake covered). This will teach you to use the bike’s weight to assist in turning. Constantly work until you have the tightest circles possible. In regards to upper body position, always keep your shoulders square to the bars (as it turns), and keep the arms and the knees slightly bent, and never rigid. This will get your muscle memory charged for advanced techniques.

7. Loose Pressure on Handlebars
This is imperative for any type of riding, from the road to the dirt. This provides no pressure on the front end, allowing the suspension to work as it should. Remember…let the suspension work on its own! The tighter the grip, and the tighter the pressure pushing on the handlebars, the harder the suspension has to work. The lighter the grip and pressure, the less the suspension has to work. Most riders get this concept on the street, but things change dramatically off road–especially when you’re standing.
Learn to keep pressure off the bars while standing by holding yourself up with your legs. This is why it’s also vital to be on the balls of your feet as explained in tip number 6 above; this allows you to remain balanced without leaning on the bars. Need a break? Clinch the gas tank with your inner knees on stretches of off-road that aren’t challenging or require your full standing abilities.
8. Two Finger Clutching
The bigger the bike, especially when loaded, the more you’ll need to rely on the clutch for slow-moving situations. This is known as slipping the clutch, but you don’t want to over do it. Using just your index and middle fingers on the clutch allows you to have more stability on the bars when turning or stopping vs. having all four fingers on the clutch. A good way to learn to slip the clutch while practicing with two fingers is to walk your bike. Get on the left side and walk at a slow, even pace, slipping the clutch to keep the bike moving. Try to keep the suspension completely even while doing this (not decompressing or compressing), which will help out for advanced techniques.
Also, shorter clutch levers are available, but for a quick fix get out the dremel tool. This allows you to use full action of the clutch without it not fully depressing due to your ring/pinky fingers being in the way.

9. Starting in dirt
You’ll see newbies over and over sit on the bike with both feet off the pegs, goosing the throttle in order to get unstuck or up a rocky incline where they stopped due to loss of balance or whatever else. Practice always having one foot on a peg, and “pushing” off the ground with the other (think pushing a skateboard as your bike begins to move). Immediately get into the standing position and let the center of gravity/bike do the work. It seems illogical at first, but you’ll get it.
10. Picking Up Your Bike
We saved the best for last. This is why crash bars are important; if you’re out there having fun off road, you’ll likely drop your bike once, twice or maybe 10 times in a weekend. We all do it – especially when working on techniques like the ones listed above. If possible, always try to leverage the weight of the bike the most, and bend down next to it with the bike behind you, lifting with your knees to get the bike upright. Get a hand on the front brake, and continue your ride or practice. The quicker you put a fall out of mind, the quicker the enjoyment will return for the task at hand – enjoying adventure motorcycling.