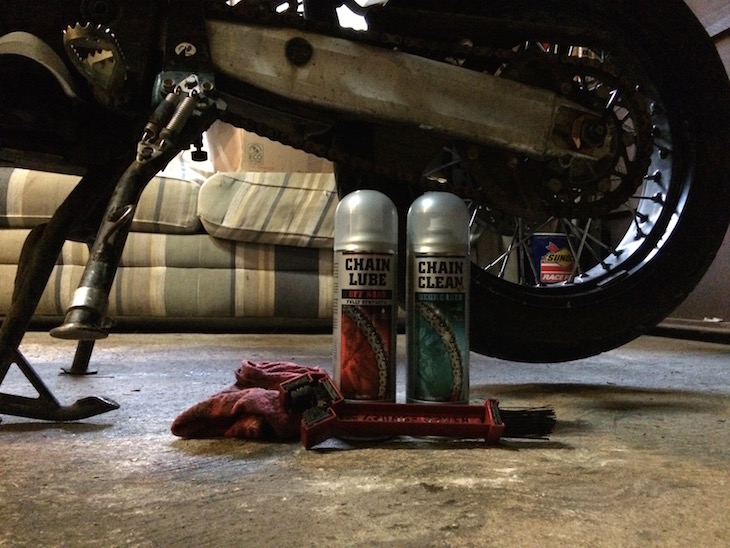
Chain Maintenance (Cleaning and Lubing)
Just about every owners manual and service manual will proclaim that the drive chain should be cleaned, lubed, and adjusted every 500 miles, or something to that effect. I am confident that I am not the only one who might neglect that bit of preventive care.

The technological advancements in chains over the past few decades, largely the introduction of sealed chains such as the o-ring, x-ring, and w-ring types, has massively extended chain life. The need for such an aggressive service interval is probably not applicable in anything but the most grueling of situations. That being said servicing your chain is still something at needs to happen, and takes much less time than the owners of shaft-drive motorcycles will have you believe. Regular maintenance will insure the at the chain is working as effectively as possible, increasing the service life, and the horsepower to the wheel. It also gives you a good chance to inspect the chain and sprockets, is there irregular wear, is replacement on the horizon? Personally I like to run gold chains, partly because they look rad, but also because they look really bad dirty and that prompts me to clean my chain more often.
Step One:
Get the motorcycle on it’s center-stand or a race stand with the rear tire off the ground and the transmission in neutral. While cleaning and lubing can be done with both wheels on the ground it is a bit of a pain having to roll it to get to all of the chain.
Step Two:
Apply the cleaner. I am using Motorex Chain Clean, it is not the only chain cleaner, but it is my favorite as it is easy to apply and works very well. It is important to use a cleaner that is not going to damage the o-rings or seals in the chain. I used WD40 for years without any issues, and know a few guys that swear by kerosene, your mileage may vary and hours can be spent reading about these options on the internet.
Step Three:
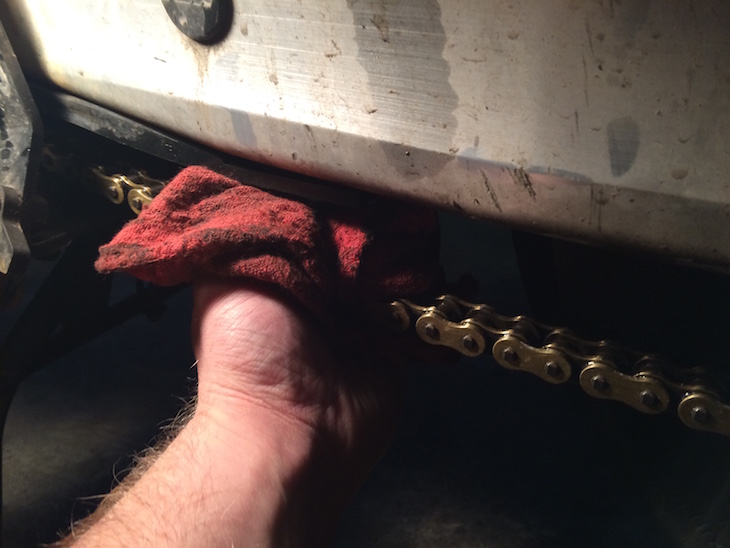
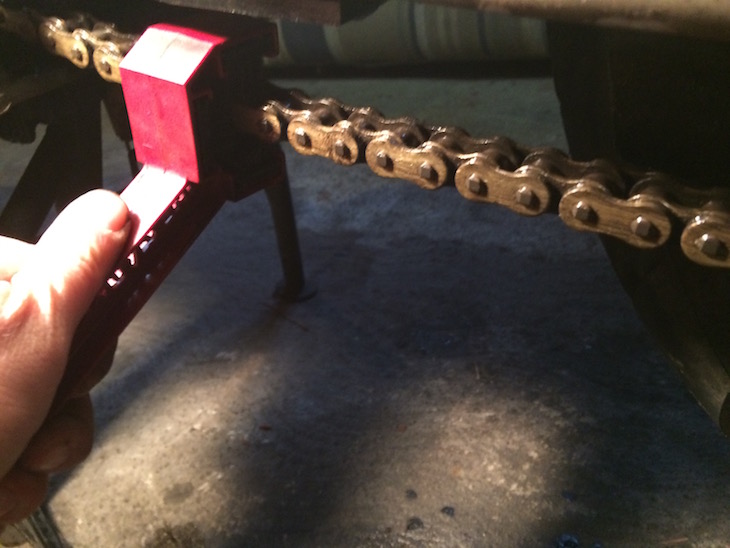
At this point I will spin the rear wheel in reverse (to prevent any pinch hazard with my fingers and the rear sprocket while working below the swing-arm) and use a Grunge Brush to scrub down the chain. The Grunge Brush was designed for cleaning chains and can clean three sides of the chain at the same time. Any brush would work for this task, but the Grunge Brush makes the job much quicker. After getting a brush on all sides of the chain I wipe it down with a rag to get the residual cleaner and grime.
Step Four:
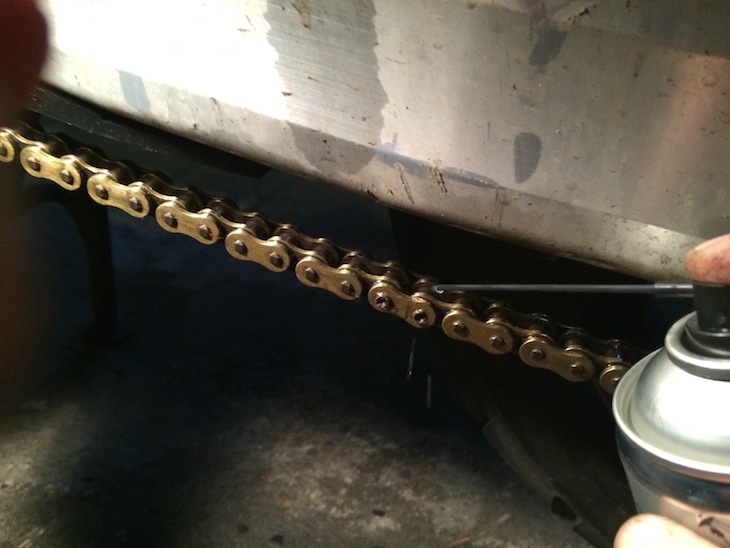
Lube the chain, spray in the inside of the chain, centrifugal force will work the lube outwards. I like to start with the master-link, just so I have an easy to spot reference as to where I started. Generally I will go around twice, once for each side (inboard and outboard) of the chain. A quick post lube wipe down helps to keep the fling down.
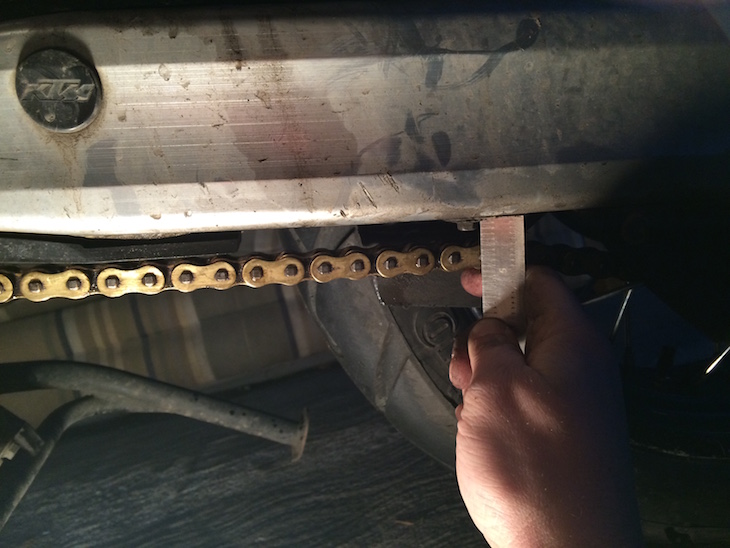
Step Five:
Now that everything is cleaned and lubed, this is a good time to check your chain tension. There are a handful of different ways chain tension (also known as chain slack) can be specified. Some manuals will give the tolerance with the motorcycle on the side-stand, others on the center-stand (or the suspension slack), while some older manuals will specify the swing-arm being parallel to the ground (this is where the chain is the tightest during swing-arm travel). Adjusting the chain to the published specification while the motorcycle is in the wrong position (i.e. on the center-stand instead of the side-stand) will lead to incorrect adjustment. A chain that is too tight or loose will damage other drive line components (sprockets and bearings) and cause them to to wear at an accelerated rate.
Final Thoughts
Hopefully this little walk through has helped remove any intimidation to this small but important piece of rider level maintenance. Godspeed on your travels and have fun out there.