This step by step tutorial will show how to connect a Touratech locking mount onto your Harley Davidson using the Harley Davidson bar mount or fairing mount kit. This article will also cover installation of the GPS power cradle into the Touratech locking mount. This article does not cover the installation of the bar mount or fairing mount kit onto your motorcycle (please refer to instructions provided by Harley Davidson).
Parts used:
- Touratech
- 065-0524 (black) OR 065-0523 (silver)
- G11270 Zumo 660/665 Motorcycle power cradle (included with GPS unit)
- Harley Davidson
- 92238-09 (Fairing mount) OR 76000191A (Bar mount, chrome) OR 76000192A (Bar mount, black)
Compatible Harley Davidson Models:
Fairing mount:
- 2006-2013 Electra Glide, Street Glide, CVO Electra Glide, and Trike models
Handlebar mount:
- 02-on V-Rod
- 1996-on XR, XL, Dyna, Softail, Road King, Road Glide
- 2014-on Touring and Trike models
Tools needed:
- 2.5mm Allen key
- 3mm Allen key (for Harley components)
Bar Mount Kit (Skip this section if using Fairing Mount Kit)
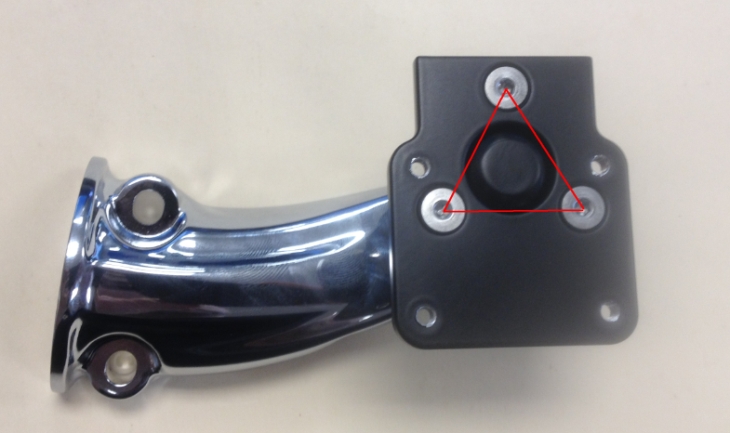
Rotate the Harley mounting plate so that the ‘triangle’ of 3mm bolts points upwards. You can adjust the tension on this mounting plate using your 3mm wrench.
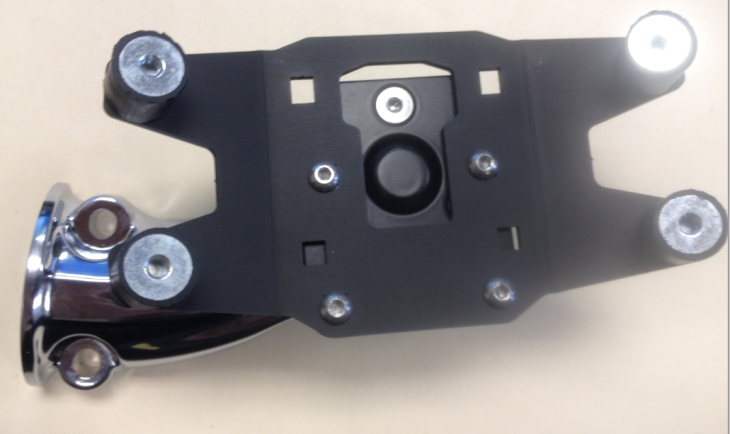
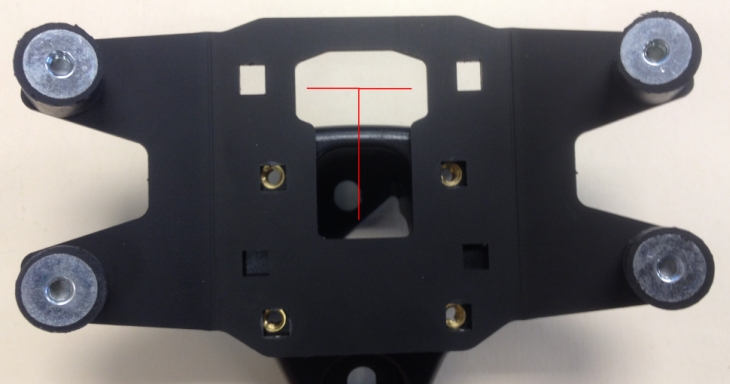
Set the backing plate from the Touratech locking mount onto the Harley mounting plate, being careful to align the 4 holes for your M4x10mm bolts. Also make sure that the “T” on the backing plate it facing up.

Use the 4 M4x10mm bolts included with the Harley kit to secure the Touratech backing plate to the Harley mounting plate. Don’t over tighten these small bolts, using blue thread-lock here is recomended.
(Skip to Locking Mount Assembly if you are using the Bar Mount Kit)
Fairing Mount Kit (Skip this section if using Bar Mount Kit)
Refer to page 2 of the Harley Davidson instructions to position, drill and secure the Fairing mount kit to your bike. You may also want to route the wiring into the fairing prior to installing the locking mount. Be sure to leave plenty of slack to position the power cradle into the locking mount. You can pull the additional slack back into the fairing after installing the locking mount.
(Fairing mount not shown on bike in photos, be sure to install the mount onto your bike first)
Set the backing plate from the Touratech locking mount onto the Harley mounting plate, being careful to align the 4 bolt lower bolt holes. Also make sure that the “T” on the backing plate is facing up.
Use the 4 M4x10mm bolts included with the Harley kit to secure the Touratech backing plate to the Harley mounting plate. Don’t over tighten these small bolts, using blue thread-lock here is recomended.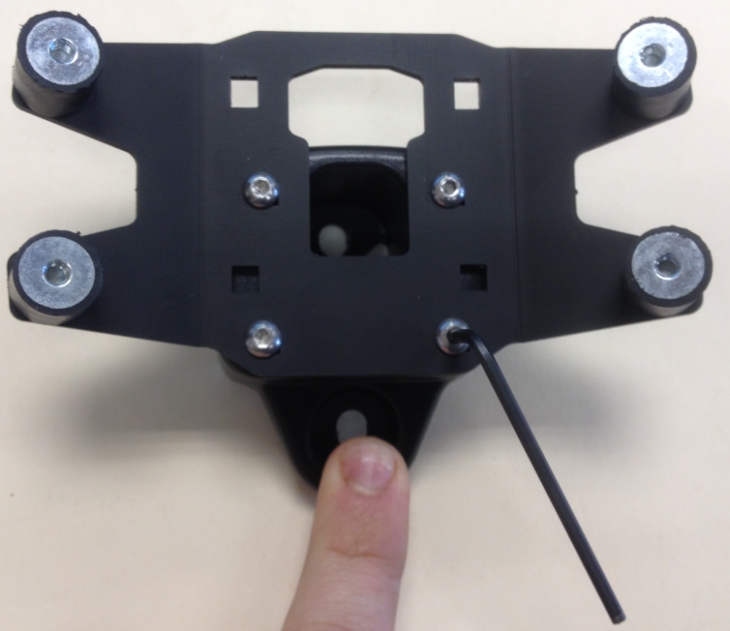
Locking Mount Assembly
Use the 4 M4x5mm bolts included in your Touratech locking mount to secure the locking cradle into the 4 rubber vibration isolators on the Touratech backing plate. Don’t over tighten these small bolts, using blue thread-lock here is recomended.
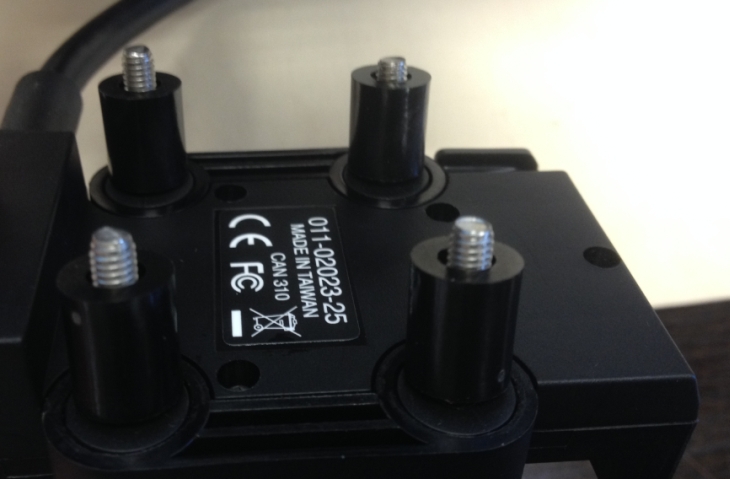
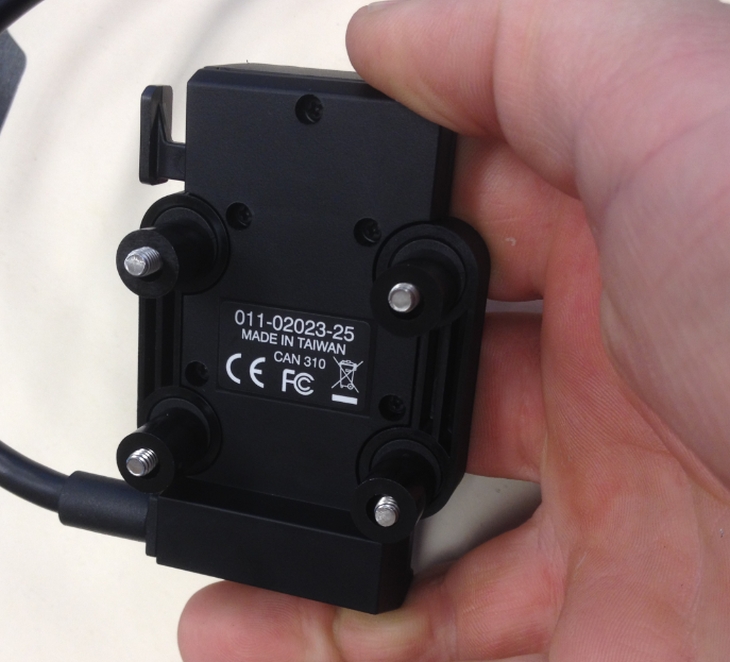
Place one M4x20mm bolt through each of the 4 holes on the GPS power cradle, using a small washer in between the bolt and power cradle. Then place one 12mm spacer on the bolt behind the power cradle.
Carefully insert the remaining 3 bolts and spacers onto the GPS power cradle. Two pieces of masking tape over the bolt heads on the front of the GPS power cradle can help to hold the bolts in place while working with these spacers.
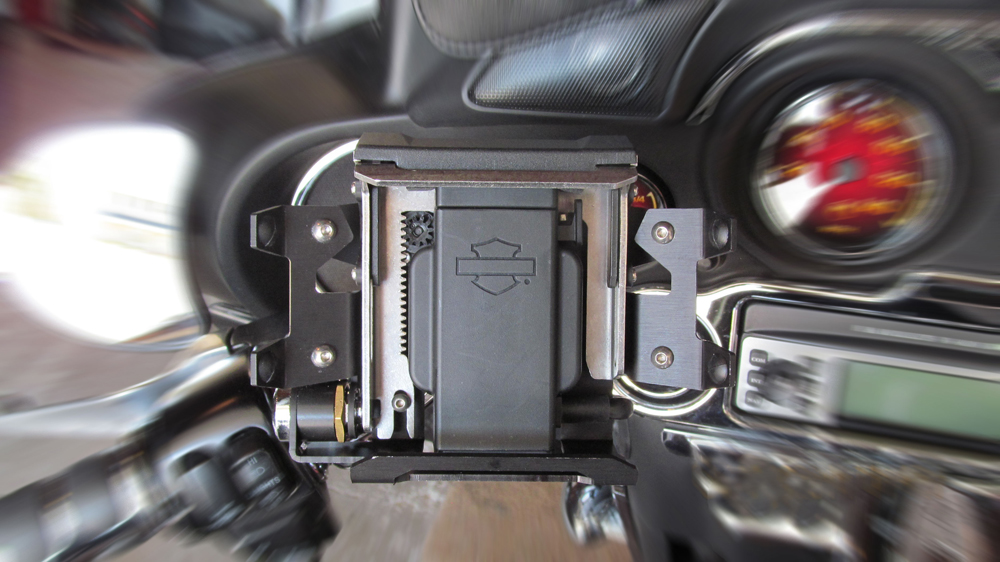
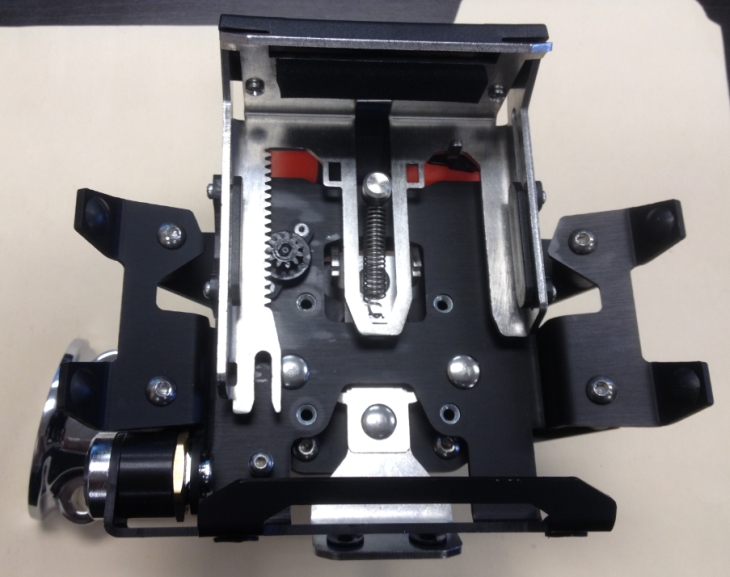
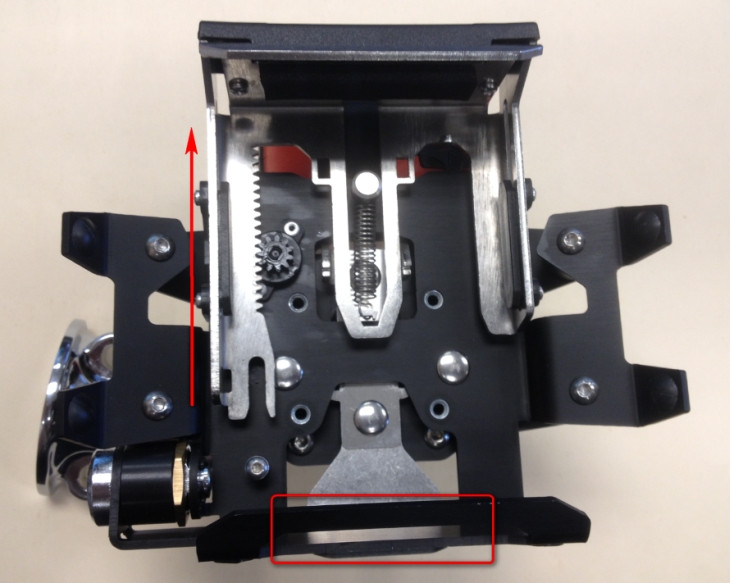
Prepare the Touratech locking mount for installation of the GPS power cradle by releasing the upper latch ‘hood’. This is released by turning the key ½ turn clockwise, and pulling up and forward on the silver release lever under the bottom of the Touratech mount to the right of the lock cylinder, see photo below. The ‘hood’ should be in the raised position, with the spring relaxed. This will give you enough room to install the GPS power cradle into the Touratech locking mount.
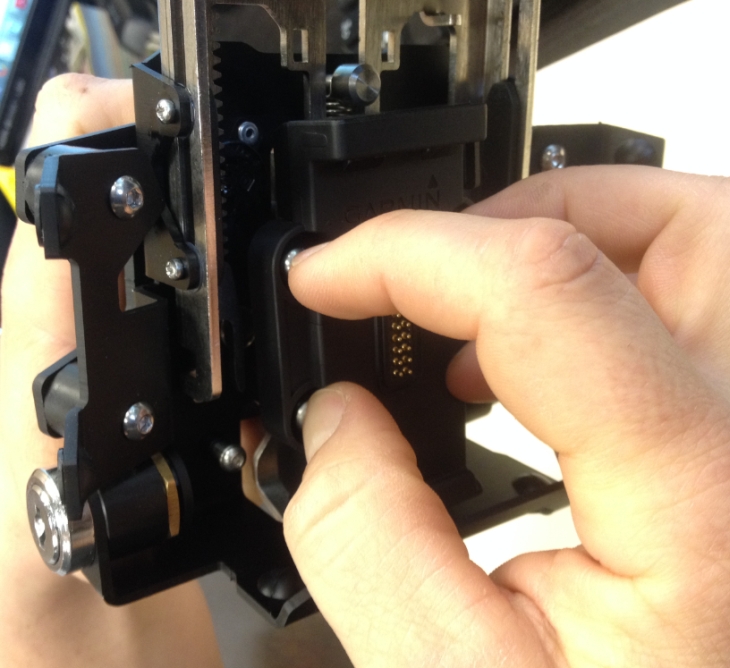
Carefully hold the power cradle in one hand with the bolts and spacers facing up. Two pieces of masking tape over the bolt heads on the front of the GPS power cradle can help to hold the bolts in place while working with these spacers.
Hold the Touratech locking mount in your other hand and rest locking mount upside-down directly over the power cradle bolts and spacers. Do your best to line up the 4 bolts with the 4 threaded holes in the Touratech locking mount.
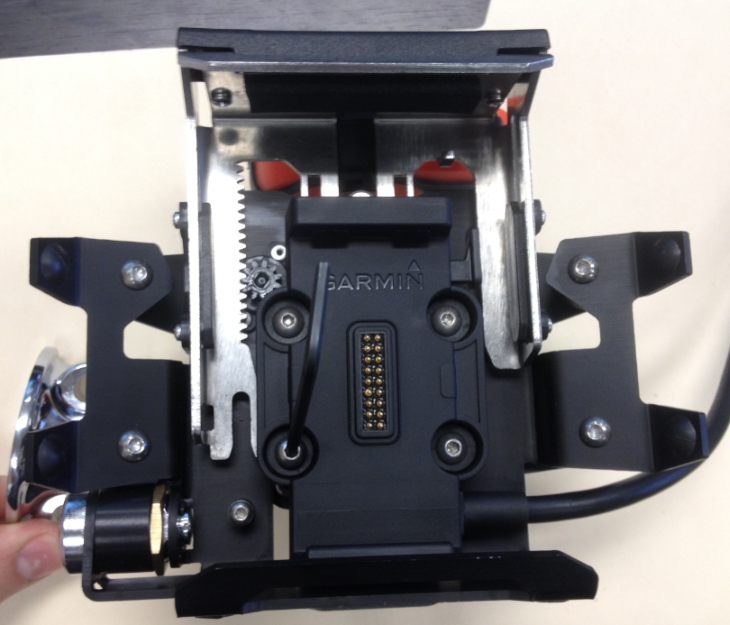
Then you can ‘flip’ over the whole assembly and tighten the 4 bolts. Don’t over tighten these small bolts.
Refer to the Harley Davidson instructions (Harley mounting bracket and plate instructions) to finalize attaching the bar mount or fairing mount and wiring your power cradle to your bike. Enjoy the finished product.