The Touratech RallyeForm Skid Plate is a very strong, light-weight and aesthetically pleasing revolution in motorcycle protection. It’s available in black and bare aluminum for the KTM 1090/1190/1290. In this video we show you the tools and step by step procedures for installation on the 1090 ADV R. The process is the same for each of the KTM big bikes.
Video Transcript:
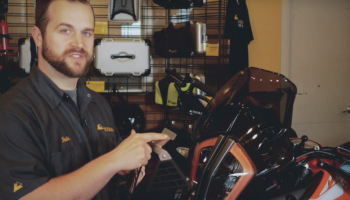
Hey everybody, Iain here with Touratech USA and today we’re going to be doing an installation of a Touratech RallyeForm Skid Plate on a KTM 1090 Adventure R. The RallyeForm Skid Plate is very unique in that it is a molded one piece of aluminum skid plate. There’s no welds on it. It’s all built with a technology that’s real similar to hydroforming that creates a very smooth, very strong surface with no welds or bends on it. This is the RallyeForm Skid Plate itself. You’ll notice this is all one piece of aluminum. There’s no welds on it, there’s no sharp bends. The skid plate is very smooth and it’s very strong because it’s work-hardened the way that it’s built. So this is the actual skid plate that we’re gonna be installing onto the motorcycle. This one is anodized black but it is also available just in a bare silver finish.
This is the bracket for the back side of the skid plate. You can see here it mounts at the bottom of the motorcycle’s frame where the foot pegs bolt on. Bracket’s made out of stainless steel, laser cut, and then bent in shape. This is the bracket for the front of the skid plate. It’s made out of tubular stainless steel and then it’s got these two ends welded onto it that go into the front end and mounts. This supports the front of the skid plate on the motorcycle.
This is the hardware pack that comes with the skid plate. It’s got a number of stainless steel brackets in it that support the skid plate from the underside of the engine as well as all the nuts and bolts and spacers that you’ll need to get her bolted on. You’ll notice in this video that I use the KTM factory toolkit when installing the skid plate. You need a pair of pliers, a Torx 145 Driver, 8 and 10 millimeter sockets, a 13 millimeter open end wrench with the KTM bottle opener works awesome for, and then a few other tools that weren’t in the kit like a pair of vice grips, an 8 millimeter Allen driver, 6 millimeter Allen driver, and a 3 millimeter Allen drive. I actually cheated a little bit and used a Torques T30 that’s in the kit in place of the 6 millimeter Allen drive and it works just fine. So that’s what you need. Let’s get to work.
The first step we have to get to is removing both of the foot pegs and on the brake lever side of the bike, that means we have to remove the brake lever. So let’s get started by removing this T45 bolt and it does have a 13 millimeter nut on the back side of it that you have to get ahold of in order to do that. Take the bolt out, screw the nut onto the back of it and set it aside.
Now that we’ve got the brake pedal out of the way, we can remove this foot peg pin. Gotta pull the cotter pin out of the bottom by bending the ends straight. Sometimes you have to cut it. Grab the little washer that falls out and then push the pin out from the bottom.
Once you get the pin out, pull the foot peg out and make sure the spring doesn’t go flying across the garage. I like to just loosely reassemble everything back in the foot peg so that we don’t lose it. So now that you’ve got the foot peg out, we can remove the bracket that holds the foot peg in place. Now the bracket’s out, put both the bolts in the bracket and set it aside so you don’t lose them and go over the other side of the bike and do the same process. The other side’s quite a bit easier because you don’t have to remove this brake pedal. You just take the foot peg out, take out the two bolts, don’t lose the parts.
Now we have to prep the rear bracket for the skid plate. You’re gonna take the two little J-nuts from the hardware pack. You’re gonna install one on the front side of the bracket here and the other one on the rear side of the bracket here. These install by just pushing over the material and lining the threaded portion up with the hole. Takes a little bit of force but they go in just like that.
Now you’re gonna take your foot peg brackets and you’re gonna decide if you want to install them in the lower position or in the upper position. These are reversible to change the foot peg height. We’re running the low position on our bike so you take your foot peg brackets, take the supplied M8 by 20 bolts and just drop them through the foot peg brackets. Now you’re gonna take your foot peg brackets with the bolts through and just line up the rear support bracket and just finger-tight thread these bolts in here so that they stay in place.
Now that this is threaded in just loosely so that it’s holding everything in place, go to the other side of the motorcycle and install the two screws loosely over there. That way you know everything is in place before you tighten anything up.
Now that you have the foot peg brackets installed on both sides of the motorcycle we’re gonna reinstall the brake pedal. All right, now we need to prep the two brackets that go underneath the engine for installation. That’s very simple, you just take these little rubber bumpers, push them through the bottom and then grab the little tail, pinch it, pull it through until the barb expands over the back side of the bracket. You got six of these you need to do.
The brackets that go underneath the engine, there’s two of them. The one that goes all the way up at the front has two bolt holes in it and it’s kind of a unique shape. You’ll see it has a short side above the bend and a long side below the bend. You want to make sure you orient the bracket short side up like this. For the front bracket, you use two of the M5 by 25 bolts with four washers and two nuts and for the center bracket, the one that goes underneath, you just use a single long bolt. This is an M6 by 70 and an appropriate nut and two small washers. With these bolts and nuts, they are stainless steel going into stainless steel, so be sure that you use anti-seize, something like this, so that the threats don’t gall while you’re tightening them down.
In order to put the front crossbar mount onto the skid plate, first you have to orient it correctly so the way I’m holding it here, how it bends down, you want the motorcycle to be going forward so you want it to bend down from the bike and if you look at it horizontally this way, you see there’s one side that has a bend up in it. That’s the side that goes opposite of the exhaust pipe so this side goes on the clutch lever side of the motorcycle and you want to orient it so that it bends down. Now you just hold that in place here on the front of the skid plate and then use this bracket to pinch it against the front of the skid plate and you tighten that all into place with these M6 flange head bolt. Make sure you put lock tight on these bolts here because they’re gonna see a lot of vibration. You don’t want these coming out.
Once you’ve got this assembled enough it will hold itself together, just leave the bolts totally loose. You want to have a whole lot of play while you’re lining everything up under the bike.
Now we need to remove the main bolts that hold the bottom of the OEM crash bars in place. We’ve just got to pull those bolts out. You don’t have to take the bars off but we’re gonna pull the bolts out and then replace them with some longer Teradek bolts once we put the skid plate on.
So now that we have this bolt out, we’re just gonna go pull the exact same bolt out of the other side of the bike. So the instructions make this step a little bit complicated. There’s a number of different spacer combinations that we use in these positions here that go into the crash bars to fit various different motorcycles but because this is a 1090 R, same as an 1190 R, you just use two of the 17 millimeter spacers, so you grab the big M10 bolts, take the washers, put a little lock tight on them, and then grab the two 17 millimeter spaces and go to work bolting this onto the bike.
Now we’re ready to hang the back of the skid plate with the two remaining flange head bolts. The reason we left everything loose while we were installing it is so that we can adjust the fit here and make sure we get the bolts lined up properly. You don’t need any lock tight on these bolts because the J nuts that they thread into have a mechanical locking agent built into them.
With the skid plate hanging loose in place now, we can adjust the fit to make sure that there’s good clearance around the exhaust pipe header and make sure that everything’s centered where it should be and then start tightening all the bolts. I like to start with the flange head bolts that hold the skid plate in place first and then go to the big bolts at the front and then the foot peg mount bolts at the back.
Now that we have the skid plate installed, tightened, ready to go, the last step is installing foot pegs. Now some of you might be thinking, “You’re crazy, you installed the brake pedal before you put the foot peg pin in,” but the trick is, we’re gonna install the foot peg pin on this side from the bottom. That way, next time you don’t need to take a brake pedal off if you want to pull the foot peg off on this side. The hardest part is dealing with the foot peg spring. There are a few good ways to do it. If you have a tapered punch, that sometimes work well. If you have a pair of vice grips, that can work too. We’re just gonna struggle through it with vice grips today so here we go.
So I like to start by putting the peg in place and just putting the pin in slightly from the bottom and then with the spring compressed, feed it into position as close as you can to all the way and then push the pin in a little bit then pop the vice grips out, finish driving the pin in like that. Washer and your cotter pin.
Okay, so we got this foot peg installed. Go install the foot peg on the other side. She’s ready to go. All right, now you’ve got your RallyeForm Skid Plate installed and your bike’s ready to ride. Hope you have a great time out in the woods and go have fun with that protection.