Couldn’t make it to one of our in-house GPS classes? No worries! now you can join Touratech Adventure Expert and Touratech Rally Ride Coordinator, Eric Archambault for this in-depth, GPS skills class.
Full Transcript:
This is the part of the Navigating with Tracks: Tips and Tricks class that is gonna focus on the Garmin Zumo 590 and 595, the Garmin Zumo 350, 395, 396, and the BMW Nav 5 and Nav 6. All of these units are running the same platform, the same software, and should line up nicely with all the screenshots we have. These were all taken from a Zumo 595, so the important stuff will be in the same place any which way.
And at this point, we are assuming that you have taken your tracks from Garmin Basecamp, you’ve imported them into your GPS unit, and now it’s just a matter of displaying them on your map, so you can then navigate with them.
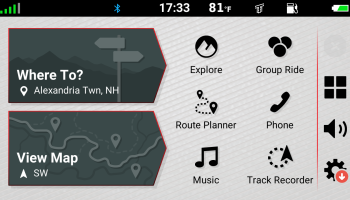
So, this is the main screen on your GPS, and from here, we’re gonna want to go to apps, and then tracks. And this is gonna be the same as the track manager, if you were more familiar with the hiking unit, such as the Garmin Montana.
Same thing, just slightly different name. And, under the save tracks tab that we have pulled up here, you’ll have all the tracks that you’ve put into the GPS. There are arrows of … You can put quite a few in there, you might need to scroll. In this case, we’re gonna click on that first one, and it’s gonna pop you over to a preview screen. And, this screen is great to just make sure it is indeed the track that you want, and if you are in that area, right around the track, your icon would pop up there.
In this case, I’m previewing a track that I’m quite a ways away from.
Now that I know that this is indeed the correct track and the one I do want to display on the map, in the upper left-hand corner, you have your wrench.
If you click on that, it will get you to this menu, and the first thing right on the top there is show on map, and you’d want to click that box on the right-hand side, and then it would show on your main map, as we discussed in the Navigating with Tracks class earlier on. We do want to set the color to be something that’s gonna contrast well. So, in this case, the track was green. Whether or not you want to navigate with that, I probably would change it to red or something, but we cover that in more detail.
And right below show on map is set color, so that’s where you’ll have the option to go through and change that. And at this point, now that you have it on the map, it shown on the map, you’ve picked a good color that you’re happy with, hit that back arrow a couple of times until you’re back to your main screen here, and you hit your view map, and you’ll be sitting right there waiting for you, and then just chasing it.
All right. If you have any questions, give us a call, 1-800-491-2926 and be safe out there and have fun.